Wednesday, June 22, 2011

Pineapple Upside Down Cake

Pineapple Upside Down Cake is my favorite kind of cake! You bake it upside down and then flip it rightside up when it's done. I loved this recipe and I know you will too. As long as you like pineapple... :)

Difficulty: Medium
Taste: *****

1/2c butter
1c packed brown sugar
12 pineapple rings in juice (canned-you'll need a 20oz can and an 8 oz can)
2c flour
2tsp baking powder
1/2tsp salt
1/2tsp ground nutmeg
1/2c butter, softened
1/2c sugar
1/2c packed brown sugar
2eggs
1/2c milk
1tsp vanilla
whipped cream and cherries (optional)

Heat oven to 350 degrees. Butter or spray the bottom and sides of a 13x9 baking pan. Line bottom of pan with parchment paper (not the same as waxed) and set it aside. For pineapple topping, melt 1/2c butter in a medium saucepan over low heat. Stir in 1cup brown sugar. Bring to boiling over medium heat, stirring frequently. Pour into prepared pan. Drain pineapple rings, reserving 1/2c juice. Fit 12 rings into bottom of pan. In a medium bowl whisk together flour, baking powder, salt, and nutmeg. In a large mixing bowl beat softened butter, sugar, and 1/2c brown sugar with electric mixer on medium speed for 2mintues, scraping sides of bowl occasionally. Add eggs; beat until combined. On low speed, beat in half the flour mixture. Pour in reserved 1/2c pineapple juice and the milk; beat until combined. beat in remaining flour mixture and vanilla.Spread batter carefully over pineapple slices in pan. Bake 30-35 minutes or until toothpick inserted near center comes out clean. Cool in pan on wire rack 10 minutes. **If you flip the cake too soon, the pinapple rings may stick to the pan.** Place a serving trap or baking sheet over cake, and carefully invert. If any pinapple sticks to pan, gently replace on cake top. Serve warm topped with whipped cream and cherries. Store at room temp for up to 3 days. Makes 12 servings.


Summer Soba Noodles

I found this awesome recipe in Parents magazine. The soba noodles they called for were whole-grain buckwheat. Unfortunately I didn't read that before I went out and bought the soba I usually buy...but oh well! It still tasted awesome. :D

Difficulty: Easy
Taste: ****

8oz soba noodles
1c frozen shelled edamame (soybeans) thawed
1c shredded carrots
2T sesame seeds
1/4c peanut butter
2T light mayo
2T reduced sodium soy sauce(reduced sodium is a must; regular has too much)
2T canola oil
2T hot water
1T rice vinegar
1T toasted sesame oil
2tsp honey
1in piece fresh ginger peeled and chopped
1clove garlic, peeled and quarter

cook noodles according to package directions. (Some say 2 minutes others up to 8 minutes depending on what kind you get.) Drain and rinse with cold water; drain again. In a large bowl, toss the noodles with edamame, carrots, and sesame seeds; set aside. Mix peanut butter, mayo, soy sauce, canola oil, hot water, vinegar, sesame oil, honey, ginger, and garlic in a covered blender or food processor until smooth. Toss into noodle mixture. Makes 6 servings.

Japanese Rice Balls (Onigiri)

Someone once told me Onigiri in Japan are like sandwiches to us. They're extremely popular in your bento(lunch box). I love these rice balls, although because of my distaste for seafood I can do without the bonito flakes (I love using chicken instead) and I don't eat the seaweed wrapped around it. They're really fun to make and very filling.

Difficulty: Easy
Taste: ***

4c shortgrained white rice (minute white rice is easiest)
4c water (I actually like using half water half vegetable broth to give the rice more flavor)
1c water
1/4tsp salt
1/4c bonito shavings (dry fish flakes) but again, I like using chicken instead!
2 sheets nori (dry seaweed) cut into 1/2in strips
2T sesame seeds

Boil the water and vegetable broth. Cook the rice in the boiling water according to the package directions. Let it cool before seperating it into 8 servings. After dipping your hands in the salty water, using one serving at a time, take half and shape it with wet hands. Make a well in the center and fill with bonito shavings (or chicken or whatever you want to use) then take the second half of the serving of rice and form on top. Try to shape the rice into a triangle. Wrap the nori around it then sprinkle the top with sesame seeds.


I really need to work on shaping mine into triangles...
they look pretty mishapen haha!

Miso Soup


I've always wondered about Miso Soup and how to make it. My friend from Japan took me to a local shop and helped me find some of the ingredients so I'll know for next time. This really is a very simple but great recipe to make for lunch. I didn't know how great it would taste since it's made with tofu, but we all reallly likeit!

Difficulty: Easy
Taste: ***

2tsp Dashi granules
4c water
3T white miso paste
8oz pkg silken tofu, diced
2 green onions, sliced diagonally into 1/2in pieces

Combine water and dashi in saucepan and bring to a boil over medium high heat. Whisk in miso paste. Stir in tofu and green onions. Simmer 2-3 minutes. Serve.


Thursday, June 16, 2011

Spaghetti Bolognese

Found this receipe in Parents magazine! It was actually called "Fettuccine Bolognese" but since I used spaghetti noodles instead, I renamed it. :)

Difficulty: Easy/Medium
Taste: ****

1T canola oil
1 onion, chopped
2 cloves garlic, minced
1lb ground turkey (I used ground beef because it was all I had on hand. However, turkey is better for you.)
1/4tsp salt
14.5oz can diced tomatoes (undrained)
1lg carrot, shredded (2/3c)
3T tomato paste
1T dried Italian seasoning
1/4c Parmesan cheese
1/2lb spaghetti (or any noodle really) broken in half

Heat oil in large saucepan over medium heat; saute onion for 4 minutes. Toss in garlic; saute for 1 minute. Add turkey and salt; continue to cook for 4 minutes more or until meat is cooked through, stirring to break it up. Mix in undrained tomatoes, carrot, tomato paste, and Italian seasoning. Bring to a boil. Partially cover the saucepan; reduce heat and simmer for 20 minutes, sitrring occasionally. Stir in parmesan cheese. Cover completely and cook for 20 minutes more, stirring occasionally. During the last 20 mintues of cooking the sauce, boil the noodles according to package directions; drain. Spoon the sauce over the noodles. Makes 6 servings.

Boneless Hot Wings

For once, I'm going to share one of my recipes--one of the easiest recipes ever (there's really nothing to it; I don't even know if you could call it a recipe it's so simple, haha). I first started making hot wings when my husband fell in love with TGI Friday's boneless buffalo wings. He was constantly begging me to buy the ones in the frozen section at the grocery store. One day I set my foot down and told him we were wasting money when I could just make them at home. :) I must say the homemade kind are pretty darn good, although they are a bit too spicy for me. Of course, this could certainly be remedied by using a different kind of sauce.

Difficulty: Easy
Taste: ****

1-2T olive oil
1lb boneless, skinless chicken breast, cut up in ~1 1/2in pieces
1/2c flour
1tsp salt
1/2tsp pepper
ziploc bag
Texas Pete's Buffalo Wing Sauce

Put the flour, salt, pepper and cut up chicken in the ziploc bag. Toss until the chicken is completely coated. In a large skillet, heat the oil over medium-high heat. Place each piece of chicken in the skillet and cook until that side turns slightly brown. Turn each piece over and heat for the same amount of time. Continue to heat until the chicken is no longer pink, stirring occasionally. As soon as it's done, pour a desired amount of the buffalo wing sauce on top (it'll be smokey). *Be careful not to put too much otherwise it'll be too overpowering. Transfer to a bowl and serve!

Sunday, June 12, 2011

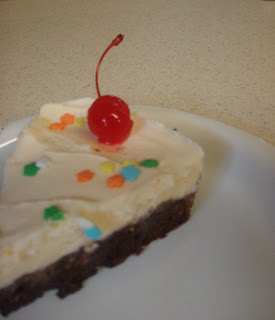
Brownie Ice Cream Torte

This delicious dessert is super easy to make! You don't even need that many ingredients. :)

Taste rating: *****
Preparation difficulty: Easy Peezy

1box brownie mix
water, vegetable oil and eggs called for on brownie box
1/2 gallon vanilla ice cream, slightly softened
2T pastel confetti candy sprinkles
16 red maraschino cherries with stems, drained

Heat oven to 350 degrees. Line 2 (9in) round cake pans with foil; grease bottoms only of foil with cooking spray. Make brownie batter as directed on box. Divide batter evenly between pans. Bake 19-22 minutes or until toothpick inserted 2in from side of pan comes out almost clean. Cool completely in pans, about 1hour. Do not remove from pans. Spread slightly softened ice cream evenly on brownies in pans. Freeze at least 2hours until ice cream is firm. Remove desserts from pans; remove foil. Place on serving plates. Cut each dessert into 8 wedges. Decorate with candy sprinkles and cherries. Store covered in freezer.


Once again, my camera sucks. X(

Nutty Maple Bars

This wonderful recipe came straight out of Better Home and Garden magazine! It's delicious and lower calorie and lower fat because the ingredients are healthier. :)

Taste rating: ****
Difficulty: Easy

2c whole wheat flour
1tsp baking powder
1tsp baking soda
2egg whites
3/4c maple syrup
1/2c canola oil
1/2c fatfree milk
1 1/2c toasted chopped nuts of your choice (I used almonds and walnuts)
1c chocolate chips (I didn't have any on hand so I cut up some semisweet baking chocolate)

Frosting:
1/4c chocolate-hazelnut spread (Yay! Nutella!)
3T fatfree milk
1T maple syrup
1/2c unsweetened cocoa powder
1c powdered sugar
2/3c toasted nuts of your choice

Preheat oven to 350degrees. Spray or grease&flour a 13x9 baking pan.In a medium bowl whisk together egg, maple syrup, oil, and milk; add to flour mixture. Stir to combine. Stir in 1 1/2c nuts and chocolate. Spread in pan. Bake ~20 minutes or until a toothpick inserted near center comes out clean. cool on rack.
In a bowl stir and combine all the frosting ingredients (except nuts). Spread frosting on bars and sprinkle nuts on top. Cut into 24 bars.


CPK's BBQ Chicken Pizza

This pizza recipe was found online (of course lol). While it was very tasty, well, it could have been better. That's why I give it only *** stars. It's the crust that did it in. While the crust was very easy to make, I found it lacking. It kind of reminded me of Pizza Hut's cardboard crust. Then when you reheat it, it's even worse. X(
My suggestion would be to use the OTHER pizza recipe on our blog (the stuffed crust pizza with the honey whole wheat crust) for the dough and baking time, but make it a BBQ chicken pizza like this one.

Taste Rating: *** Preparation Difficulty: Medium

Crust:
1tsp yeast
1-1/2c warm water
4c flour
1tsp kosher salt
1/3c olive oil


Sprinkle yeast over very warm water. Let stand for a few inutes. In mixer, combine flour and salt. While running it on low, drizzle olive oil until combined with flour. Pour yeast mixture in and mix until combined and the dough is very sticky. Coat a separate mixing bowl with olive oil and form the dough into a ball. Toss to coat in olive oil, then cover tightly with plastic wrap and set aside 1-2hours or store in the fridge until you need it. (It would be even better if you made the dough 1-4 days in advance.)

Pizza:
2 boneless skinless chicken breasts
1/2c bbq sauce
olive oil
salt
16oz fresh mozzarella cheese, sliced thinly
very thin slices of onion
chopped cilantro

Preheat oven to 375 degrees. Place chicken breasts in a pan coated with cooking spray then sprinkle them with salt. Pour BBQ sauce ontop then turn them over to coat both sides. Bake ~25 minutes or until chicken is done. Remove from oven and dice them up. Increase the temperature of oven to 500 degrees. Grab half the dough (it makes 2 pizzas) and stretch it out on a cookie sheet drizzled with olive oil. Drizzle a little bit on the crust then sprinkle with salt. Spoon some extra BBQ sauce on the crust and spread it evenly. Top sauce with half the sliced mozzarella. Sprinkle half the diced chicken and sliced onions. Bake ~12-15 minutes or until crust is golden brown and toppings are bubbly. Remove from the oven and sprinkle plenty of chopped cilantro on top. Cut into squares and serve immediately. Repeat with other crust and ingredients or save for next time.

Saturday, June 11, 2011

Cinnamon-y Goodness!

This is a great recipe if you’re new to using yeast or hate kneading dough. I found it on The Pioneer Woman’s website but made a couple of adjustments according to my tasters. I took two pans of rolls to my husband’s golf course and the men went crazy for them. A couple of them told me they were the best cinnamon rolls they’d ever had. One even said, “Wow, Travis. You’ve got a wife that plays golf and bakes? You’re a lucky man.” I was in Housewife Heaven after this compliment. And now, you can be, too! Here’s the recipe:

Cinnamon Rolls

Difficulty: Medium (Mess: Extra Large)
Taste: ***** (5 Star)

1 quart Whole Milk
1 cup vegetable oil
1 cup sugar
2 packages dry active yeast (0.25 oz. packages)
8 cups (plus 1 cup extra, separated) all-purpose flour
1 tsp. (heaping) baking powder
1 tsp. (scant) baking soda
1 tsp. (heaping) salt
1-1½ cups melted butter
2 cups sugar
Generous sprinkle of cinnamon

Maple Frosting:
1 2 lb. bag of powdered sugar
2 teaspoons Maple flavoring
¼ cups milk
¼ cups melted butter
¼ cups brewed coffee (whatever flavor you like)
1/8 tsp. salt

First, mix the milk and vegetable oil in a very large pan over the stove. Scald the mixture (turn the heat off right before it starts boiling) and let cool for an hour or so. You want your mixture to be lukewarm and definitely not hot. Think of it like this: you’re going to feed this mixture to a baby so make sure it doesn’t burn him. Once cooled, add in both packages of dry yeast and let it sit for a couple of minutes. Then, add 8 cups of flour, mix, and let sit for an hour. I like to cover my yeast mixtures with a damp cup towel. This will keep the dough from forming a hard crust on the top. I also put my dough in the unlit oven while it rises (we have a gas stove, so the pilot light stays on all the time and keeps the oven slightly warm). If you have an electric stove, I’ve heard you can put the dough on top of a heating pad set at 85 degrees to get the same effect.
Once risen, add the 1 extra cup of flour, your baking soda, baking powder, and salt. Stir mixture together. You can start rolling the rolls now or you can put the dough into the refrigerator if you’re not ready.
You’re going to have A LOT of dough right about now. Don’t let it overwhelm you. Start by sprinkling flour on your rolling surface. Take half of the dough and form a rough rectangle. It doesn’t have to be perfect, because let’s face it, it’s all going to end up in the same place anyways. Roll the dough thin like pizza dough, trying to maintain the rectangular shape. Drizzle ½-1 cup of melted butter on the dough, sprinkle with 1 cup of sugar, and enough cinnamon to dust the entire rectangle. I like to “give it some lovin’” and mix all the cinnamon, sugar, and butter together with my hands. Now, starting at the opposite end, begin rolling the dough in a neat line toward you. Keep your roll tight as you go. Pinch the seam to seal it.
Spray 6-7 aluminum cake or pie pans with non-stick cooking spray. Cut the rolls into 1 inch segments and place into the pan. Repeat process for the other half of the dough. Let the rolls rise (I know, AGAIN?!) for 20-30 minutes and bake at 375 degrees for 15-18 minutes.
While baking, mix all the ingredients together for the frosting. Mix until smooth and pour generously over the baked rolls. Don’t be stingy with the frosting. Trust me, you’ll have enough leftover to lick the bowl.

Notes on Cinnamon Rolls
This recipe takes a while to complete so make sure you’ve got all day to work on it.
I’ve heard this recipe halves well in case you don’t want to make 6-7 pans of rolls.
If you don’t have maple flavoring, you can use vanilla in its place. However, the maple is what makes the rolls. It’s $3-$4 at WalMart, which is a little high for such a small bottle, but I think it’s totally worth the investment.
If you don’t like coffee, use a little extra milk in the frosting.
Feel free to freeze the rolls if you’d like.
Give a pan of these to your neighbor and they’ll love you forever.


~Courtney

Friday, June 10, 2011

What's your favorite recipe?

My grandma always says that your best dish is your easiest dish. Therefore, my best dessert is definitely Strawberry Pie. I’d enter a pie contest with this beauty, and mostly importantly, I’d win it! This is a great summertime dessert because that’s when the fruit is the ripest and most delicious. Let’s just say that if I was on my death bed and had one last meal, I’d want the sweet, sweet deliciousness of light, fresh Strawberry Pie. Plus, I love cooking with cornstarch. I believe cornstarch (and yeast) are more magical than Harry Potter, himself.

Strawberry Pie

Difficulty: Easy as Pie
Taste: ***** (5 Star)

1 9” pie crust, baked
1 quart fresh strawberries
½-1 cup sugar
3 TBSP. cornstarch
¾ cup water
1 container Cool Whip (or your favorite whipped topping)

Start by cutting off the tops of the strawberries and slicing them in half. Put half of the strawberries in a medium saucepan and the other half in a baked pie crust. Mash the strawberries in the sauce pan. (You can use a potato masher or a beater to a hand mixer.) Add the sugar to the mashed strawberries and bring to a boil over medium-high heat. While waiting for the strawberry-sugar mixture to boil, mix together the cornstarch and water in a small bowl. Once boiling, slowly whisk the cornstarch mixture into the mashed berries. Reduce heat to medium, and while stirring constantly, cook until thickened. When the mixture is thick, pour over the uncooked strawberries in the pie shell. Refrigerate to cool. Serve each slice with a dollop of Cool Whip & ENJOY!

Notes on Strawberry Pie
Taste one of the strawberries before you put any sugar on it. If it’s nice and sweet, only use about ½ cup sugar. If they are tart, use up to one cup to make them sweeter.
Poke holes in the bottom of the pie crust with a fork before you bake it. This will make the crust bake evenly, with no bubbles.
Trust me, you’ll know when the strawberry-sugar-cornstarch mix gets thick. It changes pretty quickly and becomes a different color (darker pink/red).

~Courtney

Thursday, June 9, 2011

Courtney's Obsession

I love, love, love old cookbooks. There’s something about the nostalgia of it all that makes me all tingly inside. I don’t know when or why the obsession started, but lately, I’ve been raffling through my Nanny’s library of cookbooks. Here’s a picture of one of my favorites:


This particular one is called “Lake Cities Women’s Club” and was printed in 1978. It’s so special because my Nanny has marked her favorite recipes. To me, reading an old cookbook is like going back in time where food was simpler and in turn, more delicious.
From this book, I’ve recently tried the Sourdough Bread. This is not a recipe for those who don’t like to get their hands dirty. The dough is super sticky but certainly worth the inconvenience!

Sourdough Bread

Difficulty: Hard & Messy

Sourdough Culture:
½ cups sugar
1 cup water
1¼ cups flour

5 cups flour
½ cups milk
½ cups water
3 TBSP. sugar
¼ cups melted shortening
2½ tsp. salt
1 package yeast (0.25 oz. package)
½ cups warm water

To feed culture: Place ½ cups sugar, 1 cup water, and 1¼ cups flour in a large bowl, cover, and let sit on the cabinet for 24 hours.
To make sourdough bread: sift 5 cups of flour into another large bowl and make a well in the center. Scald ½ cups milk and ½ cups water (heat until almost boiling). Add 3 TBSP. sugar, ¼ cup melted shortening, and 2½ tsp. salt to scalded mixture. Stir until dissolved and let cool. Dissolve yeast in a small bowl with ½ cups warm water. Add dissolved yeast and 1½ cups of the sourdough culture to flour, then add the milk-water mixture. Stir with a fork then knead for 10-15 minutes. As Hannah from Little Women would say, let your bread “riz” or rise until it’s doubled in size. Work down and make into loaves or rolls. Let rise again until doubled in size. Bake at 350 degrees for 25-30 minutes.

Savory Zucchini Cakes


When you picture your favorite summer fruit, what do you imagine? I’m guessing the answer is probably watermelon, strawberries, or peaches. Mine is zucchini! And, boy, do I have a lot of them in my garden. So, instead of eating them raw or sautéed with sliced onions, I decided to try Savory Zucchini Cakes.

Savory Zucchini Cakes

Difficulty: Easy

1 medium zucchini
2 eggs
½ cup breadcrumbs
½ cup shredded cheddar cheese
1 TBSP minced garlic
Salt
Pepper
Olive Oil

First, start by cutting off the ends of the zucchini and shredding it. Once it’s shredded, place the zucchini in a cup towel and squeeze to drain all the water out. Ladies, learn from my mistakes, and don’t use your best towel here because it will turn green. Put the almost-dry-zucchini into a mixing bowl big enough to hold the rest of the ingredients. Add in the eggs, breadcrumbs, cheese, garlic, salt & pepper. Mix well to form a dough-like consistency. Heat some olive oil in a skillet (enough to cover the bottom of the pan by about ¼ inch). Shape your cakes into patties and place in the skillet. Cook 2-4 minutes on each side, until golden-brown. The smell of these babies alone will make your mouth water. Yields 5 cakes.


Notes on Savory Zucchini Cakes:
If you don’t have breadcrumbs, I’m sure you could use cornmeal and it would be just as delicious.
Feel free to use whatever kind of cheese you’d like. Cheddar is what I had on hand, but I plan on trying parmesan and mozzarella in the future.
The amount of breadcrumbs and eggs needed may vary depending on the size of your zucchini. You want the mixture to be easily formable, so if it’s thin like pancake batter, add more breadcrumbs. If it’s too dry and crumbles when you shape it, add another egg.

~Courtney

Tuesday, June 7, 2011

Sopapilla Cheesecake

Ms. Courtney introduced me to this incredible recipe. I've made cheesecake before, but never with crescent roll dough! I was skeptical, but after one bite I was done for...I had to send half of it to work with my husband just to keep myself from eating it all!

3 (8oz) pkg cream cheese, softened
1 1/2c sugar
1 1/2tsp vanilla
2 (8oz) cans crescent roll dough
1/2c melted butter
1/2c sugar
1tsp cinnamon
1/4c sliced almonds

Preheat oven to 350 degrees. Beat the cream cheese with 1 1/2c sugar, and the vanilla in a bowl until smooth. Unroll the cans of crescent roll dough, and use a rolling pin to shape each piece into 13x9in rectangles. Press one pice into the bottom of a 13x9 baking dish. Spread cream cheese mix on top. cover with the remaining crescent dough piece. Drizzle melted butter on top of the cheesecake. Stir 1/2c sugar and cinnamon together in small bowl then sprinkle over the cheesecake. Sprinkle the almonds on top. Bake ~ 45min or until the crescent roll dough has puffed up and turned golden brown. Cool completely (in the fridge) before cutting into 12 squares.

*Lum Lum*

Chicken Rice Balls

So while I was looking around for a recipe for Onigiri, I came across this recipe for Chicken Rice Balls on a random website. I decided to try them out and was happily suprised at how great they taste! It was like a tiny thanksgiving dinner all rolled up into a little ball and drizzled with sauce!

1/2c finely chopped celery
1/3c sliced green onions, divided
2T butter
2T flour
1/2c chicken broth
2c cooked rice (white is better in this case; brown seems to make it drier)
1/2c shredded cheddar cheese
1 egg, lightly beaten
1/2tsp salt
1/2tsp chili powder
1/4tsp poultry seasoning
1/2c breadcrumbs
1 can cream of chicken soup
1/4c milk

In a medium saucepan, saute celery and half of the onions in butter until tender. Stir in flour. Add broth; cook and stir for 2 mintues (mixture will be thick). Stir in rice, chicken, cheese, egg, salt, chili powder and poutlry seasoning until well mixed. Shape 1/4 cupfuls into balls. Roll each in breadcrumbs and place in a greased 13x9 dish. Bake, uncovered, at 350 degrees for 25-30 minutes.


Meanwhile, in a saucepan, combine soup, milk and remaining onions.
Cook and stir over medium heat until smooth and heated through; serve over balls.


Big Soft Pretzels

I kept thinking I had already posted this recipe on here, but I guess I haven't. This is my all time favorite snack/appetizer to serve people. :) Probably because I looooove soft pretzels so I assume everyone else does too, haha.

1 1/2c warm water
1pkg yeast
2T brown sugar
1 1/8tsp salt
1c bread flour
3c regular flour
2c warm water
2T baking soda
coarse kosher salt to taste
2-4T melted butter
1egg, slightly beaten

Sprinkle yeast on lukewarm water in mixing bowl; stir to dissolve. Add sugar, salt, and stir to dissovle; add flour and knead dough until smooth and elastic. Let rise 1/2 hour. While dough is rising, prepare a baking soda water bath with 2c warm water and 2T baking soda. Stir often. After dough has risen, pinch off bits of dough and roll into a long rope; shape into a pretzel. Dip pretzel into soda solution and place on *greased* baking sheet. Allow pretzels to rise again. Brush with egg and sprinkle with salt. Bake in a 450 degree oven for 8-10min or until golden brown. Brush with softened butter, and serve!

Sorry the pictures suck!
My camera screen is broken so we'll all just have to deal with it until I get a new one.
:\ *sigh*

Monday, June 6, 2011

New Spin on the Classic BLT

A normal BLT is just fine, but what about the people who can't stand tomatoes? Well here's the answer--apple slices!

What you'll need:
Toasted bread slices
Cooked bacon
Apple slices
Lettuce
Cheddar cheese slices
Turkey lunch meat

Mayo spread:
Mayo
Dijon mustard
pinch of thyme

Construction:

---toasted bread slice---
~smear of mayo spread~
| | |
~bacon slices~
~apple slices~
| | |
~smear of mayo spread~
---toasted bread slice---
| | |
~lettuce~
--turkey slices--
-cheddar cheese-
| | |
~smear of mayo spread~
---toasted bread slice---

Soooo gooooood.


Copycat-ish* Mexican Pizza

So I found this copycat recipe online. Unfortunately, this doesn't taste like the Taco Bell Mexican Pizza, but it still tastes really good and I'll definitely be making it again! However, next time I'm using 1/2lb instead of a whole pound of meat. I'm pretty sure using more meat was making it too dry. Hopefully this alteration will fix the problem... :)

1/2lb ground beef
1/2tsp salt
1/8tsp pepper
1/4tsp minced onion
1/4tsp smoked paprika
1 1/2tsp chili powder
2T water
8 flour tortillas
1c shortening
16oz can refried beans
2/3c mild salsa
1c cheddar, shredded
1c shredded monterey jack
1/4c diced tomato
1/4c chopped green onions

Brown ground beef over medium heat; drain. Add salt, onion, paprika, pepper, chili powder, and water. Then let mixture simmer over medium heat 8-10 min. Stir frequently. Heat shortening in heavy skillet over medium-high heat.
*TIP: If the oil is smoking it's too hot.*
Fry each tortilla for ~45 seconds per side, or until golden brown and let drain on paper towels. Heat up the refried beans in a small saucepan. Preheat oven to 400 degrees. To assemble the pizza, spread about 1/3c refried beans on face of one tortilla. Next spread 1/4 of the meat. Then another tortilla. Coat the tortilla with 2T of salsa, then split up the tomatoes and stack them on top. Next divide the cheese and onions, stacking in that order. Place pizzas in the oven for ~10min or until cheese on top is melted.

This recipe makes 4 big pizzas.
Lummy. :)